
당신은 주제를 찾고 있습니까 “root redmi note 8 t – How to root Xiaomi Redmi Note 8/8T“? 다음 카테고리의 웹사이트 https://th.taphoamini.com 에서 귀하의 모든 질문에 답변해 드립니다: th.taphoamini.com/wiki. 바로 아래에서 답을 찾을 수 있습니다. 작성자 socializziamo.net 이(가) 작성한 기사에는 조회수 56,079회 및 좋아요 533개 개의 좋아요가 있습니다.
Table of Contents
root redmi note 8 t 주제에 대한 동영상 보기
여기에서 이 주제에 대한 비디오를 시청하십시오. 주의 깊게 살펴보고 읽고 있는 내용에 대한 피드백을 제공하세요!
d여기에서 How to root Xiaomi Redmi Note 8/8T – root redmi note 8 t 주제에 대한 세부정보를 참조하세요
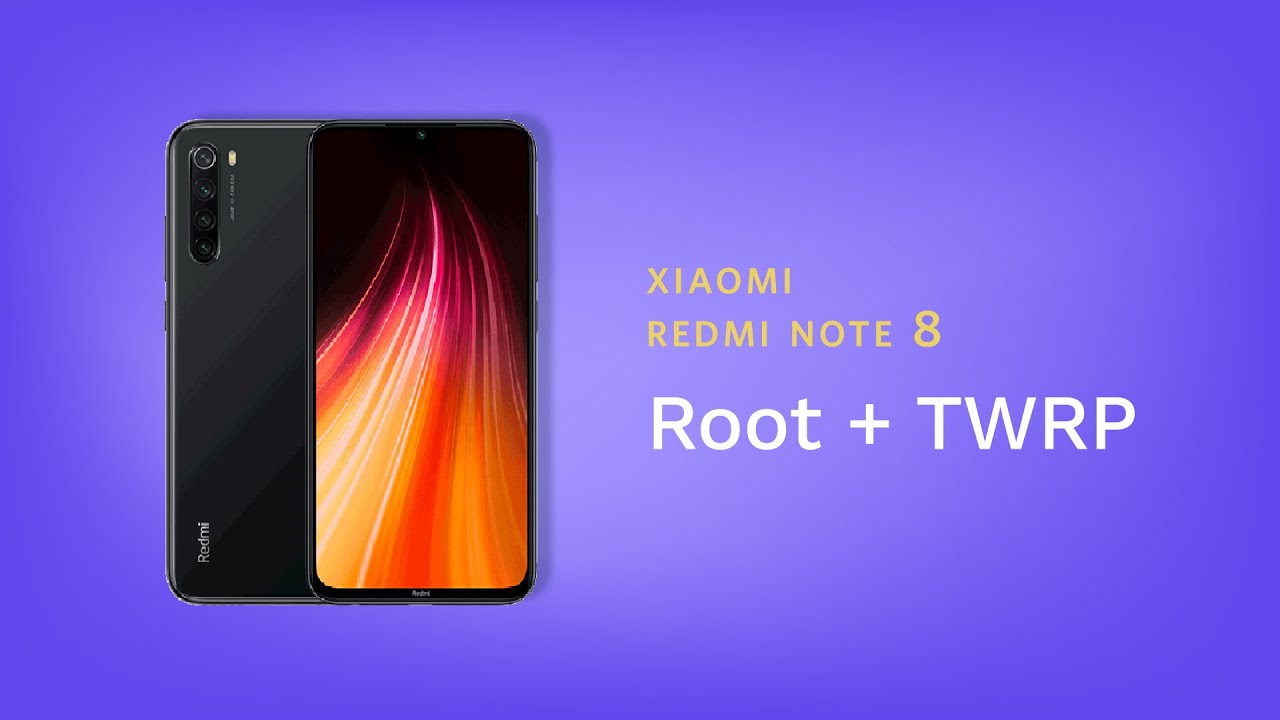
In this video I show you how to root the Xiaomi Redmi Note 8/8T. The steps:
1 – how to unlock bootloader
2 – how to install TWRP
3 – how to install Magisk
root redmi note 8 t 주제에 대한 자세한 내용은 여기를 참조하세요.
Cách root máy Xiaomi Redmi Note 8 – Học Tốt
Cách root máy Xiaomi Redmi Note 8 · Lợi ích của việc Root hệ điều hành: · Những lưu ý trước khi thực hiện Root Xiaomi Redmi 8, 8A: Hướng dẫn cài đặt Recovery TWRP …
Source: ihoctot.com
Date Published: 2/8/2022
View: 781
Làm thế nào để root Xiaomi Redmi Note 8T. Hướng dẫn [2022]
Lợi ích của việc root nhanh Xiaomi Redmi Note 8T của bạn · Các nhược điểm gốc có thể xảy ra trên Xiaomi Redmi Note 8T của bạn. Nó có thể làm cho máy chạy chậm …
Source: como.howtodo.rocks
Date Published: 8/15/2021
View: 8316
Root Xiaomi Redmi Note 8T – MobileXfiles.com
1. Download and install KingoRoot Andro (PC Version). 2. Launch Kingo Andro Root. 3. Plug your Andro device into your computer via USB cable. 4. Enable ” …
Source: mobilexfiles.com
Date Published: 9/8/2021
View: 5990
Root Xiaomi Redmi Note 8/8T Android 10 using TWRP and …
Things to check out for; · Pre-Requirement Steps · Unlock Xiaomi Redmi Note 8/8T Bootloader using ADB and Fastboot · Flash Recovery Image using ADB and Fastboot …
Source: www.androidinfotech.com
Date Published: 9/8/2021
View: 8686
Root for Redmi Note 8T | Xiaomi European Community
Hello, I’ve just installed the latest xiaomi.eu rom (MIUI 12.5) for my Redmi Note 8T (willow), I would like to root and install magisk, …
Source: xiaomi.eu
Date Published: 8/1/2022
View: 6638
How to Root Redmi Note 8T Without PC & Via Magisk
Method 1: Root Redmi Note 8T With KingRoot · Download KingRoot APK latest version and install it. · Once the installation is complete, click the ‘Open’ button to …
Source: www.thenextdroid.com
Date Published: 4/2/2022
View: 9832
TWRP for Xiaomi Redmi note 8/8T
TWRP for Xiaomi Redmi note 8/8T. Disclaimer: … Notes About Xiaomi Mi Devices: … Download the Official TWRP App (root required):.
Source: twrp.me
Date Published: 7/10/2022
View: 6474
Install TWRP and Root Redmi Note 8/8T via Magisk – DroidWin
STEP 1: Download the Required Files · STEP 2: Enable USB Debugging and OEM Unlock · STEP 3: Unlock Bootloader on Redmi Note 8/8T · STEP 4: Boot …
Source: www.droidwin.com
Date Published: 4/20/2022
View: 9968
주제와 관련된 이미지 root redmi note 8 t
주제와 관련된 더 많은 사진을 참조하십시오 How to root Xiaomi Redmi Note 8/8T. 댓글에서 더 많은 관련 이미지를 보거나 필요한 경우 더 많은 관련 기사를 볼 수 있습니다.
주제에 대한 기사 평가 root redmi note 8 t
- Author: socializziamo.net
- Views: 조회수 56,079회
- Likes: 좋아요 533개
- Date Published: 2020. 2. 6.
- Video Url link: https://www.youtube.com/watch?v=E5Dzq8y1RjU
Làm thế nào để root Xiaomi Redmi Note 8T. Hướng dẫn [2022]
Cách root Xiaomi Redmi Note 8T của bạn
Chúng ta sẽ xem trong bài viết này làm thế nào để root Xiaomi Redmi Note 8T của bạn.
Chúng tôi cũng sẽ làm sáng tỏ những điểm thiết yếu liên quan đến “root”. Nhóm của chúng tôi hy vọng bài viết này sẽ giúp bạn root Xiaomi Redmi Note 8T.
Nhưng trước tiên, cách dễ nhất là tải xuống một ứng dụng chuyên dụng, từ Cửa hàng Google Play o từ Opera Store, tùy thuộc vào hệ điều hành của bạn.
Root trong Xiaomi Redmi Note 8T của bạn là gì
“Root” hoặc “root” là một quá trình cho phép người dùng điện thoại thông minh, máy tính bảng và các thiết bị khác chạy trên hệ điều hành, chẳng hạn như Xiaomi Redmi Note 8T của bạn, kiểm soát tốt hơn (được gọi là “quyền truy cập root” ) trong các hệ thống con khác nhau của Android, iOS hoặc các hệ thống khác.
Vì Android, iOS hoặc các hệ điều hành khác sử dụng nhân Linux, quá trình này cung cấp quyền truy cập vào các quyền quản trị như Linux hoặc các hệ điều hành dựa trên Linux như FreeBSD hoặc OS X.
Tại sao phải root Xiaomi Redmi Note 8T của bạn
Trước tiên, chúng tôi muốn bạn biết rằng chúng tôi không khuyên bạn root Xiaomi Redmi Note 8T. Trên thực tế, bằng cách root điện thoại, bạn có nguy cơ mất bảo hành điện thoại.
Ngoài ra, thao tác này có thể bị cấm trên Xiaomi Redmi Note 8T của bạn. Nếu bạn vẫn muốn root Xiaomi Redmi Note 8T của mình, chúng tôi không thể chịu trách nhiệm về những hậu quả có thể xảy ra của thao tác này.
Quá trình này được thực hiện để có được quyền cao hơn, ban đầu bị giới hạn bởi nhà sản xuất phần mềm trên một số thiết bị.
Do đó, quá trình này sẽ cung cấp cho bạn sự linh hoạt (hoặc quyền) để ghi đè các ứng dụng hệ thống và cài đặt của chúng, chạy các ứng dụng đặc biệt yêu cầu quyền của quản trị viên hoặc khởi chạy các hoạt động khác mà người dùng thông thường trên hệ điều hành của bạn không thể thực hiện. Trên Xiaomi Redmi Note 8T, quá trình root cũng giúp loại bỏ hoàn toàn và thay thế hệ điều hành của thiết bị, thường là với phiên bản mới nhất.
Root Xiaomi Redmi Note 8T của bạn bằng Kingo Root
Kingo là một ứng dụng bao gồm một số phần mềm gỡ lỗi hệ thống cho thiết bị di động, bao gồm Kingo Root cho hệ điều hành của bạn, Kingo Root APK và Kingo SuperUser. Nó được thiết kế để giúp người dùng hệ điều hành chia nhỏ thiết bị của họ, nghĩa là có quyền truy cập siêu người dùng.
Kingo lần đầu tiên được phát hành trên Android và cung cấp các phương pháp root cho nhiều thiết bị di động thuộc các kiểu máy khác nhau, chẳng hạn như Xiaomi Redmi Note 8T của bạn. Đối với các phiên bản hệ điều hành, nó hỗ trợ từ phiên bản hệ điều hành 1.5 đến phiên bản mới nhất.
Để sử dụng Kingo, bạn chỉ cần truy cập web và tải xuống «Kingo Root». Sau khi cài đặt, ứng dụng sẽ hướng dẫn bạn quá trình root Xiaomi Redmi Note 8T.
Root Xiaomi Redmi Note 8T bằng Towelroot
Vào tháng 2014 năm 8, một hacker người Mỹ đã phát hành một hệ điều hành gốc cho các thiết bị di động như Xiaomi Redmi Note XNUMXT của bạn. Lỗi được sử dụng được xây dựng xung quanh nhân Linux. Lỗ hổng này đã được một hacker phát hiện và khai thác một lỗ hổng trong hệ thống con Futex, từ đó cho phép nâng cấp đặc quyền.
Lỗ hổng, được gọi là Towelroot, đã được cộng đồng hacker chỉ định là “công cụ định tuyến hệ điều hành một cú nhấp chuột”. Ứng dụng này đã được thiết kế để cài đặt nhanh chóng giống như bất kỳ ứng dụng nào khác.
Chúng tôi không đi đến xem chi tiết quy trình tải ứng dụng tại đây và cho phép bạn lên web và tự tìm kiếm.
Mặc dù ban đầu nó được phát hành cho một số phiên bản hệ điều hành của bạn, việc khai thác root đã được thực hiện tương thích với hầu hết các thiết bị di động có sẵn tại thời điểm đó.
Ví dụ: nó đã được thử nghiệm và phát hiện ra hoạt động với Xiaomi Redmi Note 8T của bạn.
Tuy nhiên, hãy cẩn thận, các bản cập nhật hệ thống mới nhất trên Xiaomi Redmi Note 8T của bạn rất có thể đã đóng lỗ hổng này và có thể không cho phép bạn sử dụng Towelroot như bạn muốn.
Lợi ích của việc root nhanh Xiaomi Redmi Note 8T của bạn
Lợi thế của việc root Xiaomi Redmi Note 8T của bạn là, trong số những thứ khác, khả năng toàn quyền kiểm soát hình thức và ngoại hình của thiết bị.
Vì người dùng cấp cao có quyền truy cập vào các tệp hệ thống của thiết bị, tất cả các khía cạnh của hệ điều hành đều có thể được tùy chỉnh, hạn chế thực sự duy nhất là mức độ trải nghiệm mã hóa của phần mềm cốt lõi trên Xiaomi Redmi Note 8T của bạn.
Những lợi ích trước mắt của hệ thống cố thủ là:
Hỗ trợ chủ đề, cho phép bạn thay đổi hầu hết các hình ảnh, từ màu sắc của biểu tượng pin đến hoạt ảnh khởi động xuất hiện khi bạn khởi động Xiaomi Redmi Note 8T.
Kiểm soát hoàn toàn nhân, ví dụ, cho phép ép xung và khởi động chưa đầy đủ của CPU và GPU.
Kiểm soát toàn bộ ứng dụng, bao gồm khả năng sao lưu hàng loạt, khôi phục hoặc chỉnh sửa ứng dụng hoặc gỡ bỏ bloatware được cài đặt sẵn trên nhiều điện thoại.
Quy trình tùy chỉnh tự động cấp hệ thống sử dụng các ứng dụng của bên thứ ba.
Khả năng cài đặt phần sụn tùy chỉnh (còn được gọi là ROM tùy chỉnh) hoặc phần mềm (như Xposed, Busybox…). Các tính năng này cho phép các cấp kiểm soát bổ sung đối với Xiaomi Redmi Note 8T của bạn.
Các nhược điểm gốc có thể xảy ra trên Xiaomi Redmi Note 8T của bạn
Bạn có thể mất bảo hành điện thoại của mình.
Trên thực tế, ngoài những lợi ích được mô tả trong đoạn trước, việc root thiết bị di động cũng có những nhược điểm riêng.
Điều quan trọng nhất là bảo hành của công ty và khả năng khôi phục nếu quá trình root không thành công.
Việc root máy là quyết định của mọi người, vì vậy hãy nhớ rằng nhà sản xuất Xiaomi Redmi Note 8T của bạn hoàn toàn có thể từ chối bảo hành. Và điều này, ngay cả khi thời hạn hiệu lực vẫn chưa kết thúc.
Hiện tại, chỉ có một số thiết bị di động có thể được unroot (hủy thao tác root) để khôi phục lại trạng thái ban đầu.
Hầu hết các máy khác, chẳng hạn như Xiaomi Redmi Note 8T của bạn, sẽ bị treo vĩnh viễn nếu quá trình khởi động không thành công.
Nó có thể làm cho máy chạy chậm hơn ban đầu
Ngoài ra, việc root thành công không nhất thiết có nghĩa là hiệu suất của Xiaomi Redmi Note 8T của bạn được cải thiện.
Một số ít người dùng hệ điều hành di động cũng cho biết thêm rằng, trong khi cố gắng cải thiện tốc độ cũng như thêm các tính năng mới, họ đã đánh mất tất cả các tính năng vốn có của thiết bị mặc dù quá trình root đã diễn ra tốt đẹp.
Vấn đề bảo mật gốc trên Xiaomi Redmi Note 8T của bạn
Ngoài ra, việc root và cài đặt ROM thay thế sẽ khiến Xiaomi Redmi Note 8T của bạn có nguy cơ bị nhiễm virus cao.
Điện thoại có thể mất bảo mật, bị tấn công bởi tin tặc hoặc kẻ khác.
Tương tự, việc tùy chỉnh các ứng dụng, tìm kiếm phần mềm để điện thoại của bạn hoạt động cũng có thể tốn thời gian.
Các ứng dụng lấy quyền root trên Xiaomi Redmi Note 8T
Dưới đây là danh sách không đầy đủ các ứng dụng sẽ được kích hoạt trên Xiaomi Redmi Note 8T của bạn:
Superuser cho phép người dùng kiểm soát ứng dụng nào sử dụng root bằng hai nút: cho phép hoặc từ chối. Do đó, một số ứng dụng không rõ nguồn gốc, ứng dụng độc hại sẽ phải yêu cầu root trước khi chạy.
Nếu bạn muốn thoát khỏi yêu cầu ủy quyền, hãy chuyển đến menu bên dưới Người dùng siêu cấp và Cài đặt, sau đó Bỏ chọn thông báo.
Titanium Backup là ứng dụng tạo bản sao lưu của các ứng dụng đã cài đặt và có thể tạo bản sao lưu thông tin và dữ liệu được lưu trữ trong Xiaomi Redmi Note 8T của bạn.
Sao lưu thường xuyên đảm bảo hoạt động tốt khi cài đặt ROM tùy chỉnh.
Ngoài ra, ứng dụng giúp xóa một số dữ liệu.
Ngoài ra, Titanium Backup có thể sử dụng tài khoản Dropbox để sao lưu (ngoài thẻ SD).
Metamorph là một ứng dụng nhỏ cho phép bạn tùy chỉnh giao diện của hầu hết mọi thành phần của hệ điều hành như màn hình khóa, màn hình chính, các biểu tượng ứng dụng và hầu hết mọi thứ trên màn hình của bạn. Chủ đề Metamorph có sẵn rộng rãi trên Internet.
Tải xuống và sao chép nó vào thẻ nhớ của bạn, khởi chạy Metamorph, sau đó chọn chủ đề đó.
Với Metamorph, bạn có thể biến Xiaomi Redmi Note 8T của mình thành giao diện HTC, Samsung TouchWiz hoặc Sony TimeScape.
Quảng cáo miễn phí là ứng dụng chặn quảng cáo trên địa chỉ IP bằng cách chỉnh sửa tệp hosts.
Ngoài ra, ứng dụng không làm chậm Xiaomi Redmi Note 8T của bạn và hầu như tất cả các quảng cáo đều bị chặn.
Bằng cách này, bạn có thể dễ dàng chặn quảng cáo bằng cách “root” trên Xiaomi Redmi Note 8T của mình.
Đường hầm SSH là một ứng dụng cho phép bạn thiết lập các kết nối an toàn bằng giao thức SSH. Ứng dụng này đặc biệt hữu ích khi bạn phải sử dụng Wi-Fi ở khu vực công cộng mà không muốn ai can thiệp vào việc trao đổi trên Xiaomi Redmi Note 8T của bạn.
Các dữ liệu như GMail, Facebook, Agenda, tin nhắn qua IP sẽ được an toàn tuyệt đối.
Tasker là một ứng dụng tự động hóa các tác vụ thông thường mà không cần đặc quyền root để chạy nó. Tuy nhiên, một số tính năng của Tasker yêu cầu quyền root trên Xiaomi Redmi Note 8T của bạn. Với Tasker, bạn có thể định cấu hình ứng dụng chạy tự động khi tai nghe được kết nối, lên lịch ứng dụng chạy / dừng, tăng âm lượng và hơn thế nữa.
Tasker sẽ giúp bạn hoàn thành công việc hiệu quả hơn.
SetCPU Nó là một công cụ hữu ích để điều chỉnh xung nhịp CPU cho từng trạng thái của máy nhằm tối ưu hóa thời lượng pin. Ví dụ, khi tải, CPU sẽ chạy hết tốc độ, trong khi khi bạn để máy ở chế độ chờ, tốc độ sẽ giảm xuống, còn khoảng 250 MHz, 500 MHz hoặc bất cứ thứ gì bạn muốn.
Với chiếc Xiaomi Redmi Note 8T được ép xung của bạn, SetCPU giúp ngăn nhiệt độ quá nóng, hiển thị nhiệt độ và đồng hồ tương ứng cho mỗi lần sử dụng.
busybox cung cấp các lệnh Linux để hoạt động trên Xiaomi Redmi Note 8T của bạn. Đối với người dùng thông thường, bạn sẽ không thấy BusyBox chạy như vậy.
Thay vào đó, ứng dụng này sẽ được sử dụng làm nền tảng cho các ứng dụng khác (chẳng hạn như Metamorph) để tận dụng bản chất nguồn mở của Linux.
“Wireless Tether” là một ứng dụng biến điện thoại của bạn thành một điểm phát sóng Wi-Fi xG.
Một số nhà khai thác cung cấp kết nối Wi-Fi cho người dùng của họ, nhưng việc thiết lập có thể khó khăn.
Tuy nhiên, rất ít nhà khai thác hỗ trợ điểm phát sóng xG. Cách sử dụng rất đơn giản, chỉ cần cấu hình mạng dữ liệu xG, nhấp vào biểu tượng Wi-Fi ở giữa, sau đó kết nối thiết bị để sử dụng với mạng đã tạo.
Tất nhiên là tất cả điều này trên Wi-Fi.
Để kết luận về gốc của Xiaomi Redmi Note 8T của bạn
Chúng tôi hy vọng chúng tôi đã cung cấp cho bạn cách root Xiaomi Redmi Note 8T.
Lưu ý, một lần nữa, chúng tôi không khuyên bạn chuyển sang chế độ root của điện thoại.
Thao tác này do bạn tự chịu rủi ro, bao gồm mọi trường hợp mất bảo hành.
Của chúng tôi đội ngũ chuyên gia là của bạn thông qua biểu mẫu liên hệ để biết thêm thông tin.
Root Xiaomi Redmi Note 8/8T Android 10 using TWRP and Magisk
Compare with Flagship mobiles. Xiaomi always focuses on cost-effective mobiles. Redmi series mostly release with mid-range processors. Redmi Note 8 is one of those mobiles. It comes with three variants- Regular, T, and Pro versions. In those variants, Both regular and “T” variants come with the same processor. After receiving the Android 10 update, MIUI is not bad in terms of UI and Ads management. But when you are a Developer or regular Root apps user, you can root your Xiaomi Redmi Note 8/8T Android 10 using the below manual method.
After root, you will lose official updates. You have to update your mobile manually. So, Before proceeding with the process, you should know why you need to do it. If you are a regular user, you can try some alternatives for your purpose that don’t require rooting your mobile. When you are a regular root apps user and developer, you can follow the below guide to achieve root on your mobile.
Should you need to Root Xiaomi Redmi Note 8/8T Android 10?
We thank XDA Developer- topjohnwu and mauronofrio (Who successfully tested this method). Without their hard work, We can’t make this method. Coming to root, you should have a proper reason, and you know what you are doing. Yes, with a minimum of 3-6 GB RAM and Qualcomm SDM665 Snapdragon 665 Octa-Core processor, You can use this mobile for basic tasks without root for 2-3 years of use correctly. Software is better compared with other manufacturers, Custom skin OS. Don’t root because everybody says that it can become the fastest car in the world when rooting your mobile. No. Rooting is to extract some performance from the device. But, you already have Powerful specs and software. So, If you are addicted to some root apps, you can root. But, if you want to test, I won’t recommend it.
How to Root Xiaomi Redmi Note 8/8T Android 10 version? (Ginkgo, Willow)
Xiaomi Redmi Note 8/8T International Variants come with a flexible bootloader other than some carrier-locked devices. It means that We can easily root different smartphone variants. The device can also accept installing TWRP recovery or any other custom recovery file/app.
For most of the methods, We follow Magisk to root our device. TWRP recovery is a custom recovery file installed on your devices because you can root them successfully. This article explained the easiest method to follow and install TWRP and Magisk on Xiaomi Redmi Note 8/8T. However, the tool required for rooting this device is the TWRP App.
You can install Official TWRP Recovery once available for your Xiaomi Redmi Note 8/8T to gain more features. Before sharing the tutorial, you may want to know that you can install any custom ROM or firmware with your device’s TWRP recovery. Does it seem complicated? Relax; we will explain everything briefly in bullets.
Samsung Galaxy S23 Renders Please enable JavaScript Samsung Galaxy S23 Renders
Things to check out for;
Make sure your device battery is above 50%.
You should back up your current files and data, full data loss process (save them on external storage).
Pre-Requirement Steps
Enable USB Debugging Mode and OEM Unlock on your mobile. To do this, go to settings >>> about >>> Tap on the “Build Number” 7-10 times consistently to enable “Developer Options,” then go to the “Developer Options” and enable USB Debugging Mode, OEM Unlock. There is no complicated process in Xiaomi Redmi Note 8/8T.
Also, download the ADB drivers. Install it on your PC.
Download Magisk.Zip (Latest Version) and Copy it to Your external Memory.
You should download and extract the TWRP package bundle and follow the steps after unlocking the Bootloader. Rename the file to recovery. img and copy the file into the ADB folder.
Unlock Xiaomi Redmi Note 8/8T Bootloader using ADB and Fastboot
Go to the official Mi Bootloader Unlock website and log in with your Mi Account.
Enter your Mobile details like phone number, IMEI, reason. You will get the confirmation code on your mobile. Enter the confirmation code on the Mi website and request for unlocking. You will receive a confirmation mail after the approval in 2-10 Days.
Install the Mi Flash Tool in the received mail. Log in with your Same Mi Account, which is used to get the software.
Switch off your device. Connect your mobile to the PC. Then, enter into Fastboot mode. To do this; Press and hold down the Volume Down + Power buttons at the same time for some time. It will boot your mobile into Fastboot mode.
After you successfully boot into Fastboot mode, Select Unlock. It will take 2-3 minutes to finish the process. After the successful process completion, Reboot your mobile.
Check again to enable “Developer Options,” then go to the “Developer Options” and enable USB Debugging Mode, OEM Unlock. Sometimes they disabled themselves after the boot.
Flash Recovery Image using ADB and Fastboot
Switch off your device. Then, enter into Fastboot mode. To do this- Press and hold down the Volume Down + Power buttons at the same time for some time.
Press the Volume Up button to continue when you see the warning message.
Now, connect the Xiaomi Redmi Note 8/8T mobile to the USB cable computer.
Launch the fastboot on your computer. Open a Command prompt on your PC and type the below command.
fastboot devices
It should display the connected devices. If you didn’t get the device, restart the command prompt and Disconnect and Connect your Xiaomi Redmi Note 8/8T. If you are detected, type the below commands one by one and hit Enter.
You should execute the commands after every successful response.
fastboot flash recovery recovery.img
The above command will flash recovery on your mobile. Type the below command to boot into recovery, or you can use key combinations.
fastboot boot recovery.img
After the process complete, Press the Volume Down+ Power button to exit Fastboot mode. When the screen goes off, Immediately Press Volume Up + Power buttons to boot into Recovery mode.
You can also use the fastboot reboot recovery command to boot into recovery. After entering into recovery mode, Go to Wipe Data/Factory Reset and Select Yes to wipe data. It will erase your saved data on your device.
Install Magisk, VBmeta Patcher, and Disable Dm-Verity-Force-Encrypt in your Xiaomi Redmi Note 8/8T using TWRP
Select Wipe->Advance Wipe->Select Cache Data.
Return to Home of TWRP select Install.
Select Disable Dm-Verity-Force-Encrypt.Zip.
After the installation, Again, navigates to Home and Select Install.
Select Vbmeta patcher.Zip. In the same way, install Magisk.zip.
After the successful installation, Reboot your mobile.
You can also install Magisk Manager in your Mobile Applications. Install a Root checker to verify your Root Status.
What More? In my opinion, you don’t need to root your Xiaomi Redmi Note 8/8T Android 10 version. If you thought you could Improve Performance By Root; With the Qualcomm SDM665 Snapdragon 665 Octa-Core processor and 3-6 GB RAM, your device can perform well. If you don’t know how much RAM you need, You will never use this much RAM. It would help if you did not Boot into Normal OS Booting by pressing the power button after firmware flash. It will boot you to a Non-Rooted environment. So, you should pay attention to the first recovery boot step. If you root your device because of the battery drain issues, you can optimize your battery without root. Beyond this, if your purpose is to Disable Bloatware apps, you can do that without using them. This method is based on TWRP custom recovery. Thus you can install Custom ROMs. When you have any suggestions or doubts, comment below. Source, (2)
Selva Kumar is an Android Devices Enthusiast, Who Can Talk and Write About Anything If You Give a Hint About the respective devices. He is a Computer Science Graduate and Certified Android Developer, Making His Career towards this Technology. He is always eager to try new Android devices — not only Software level but Hardware-level Also. Beyond this, He is a Good Swimmer, Guitarist.
Root for Redmi Note 8T
This site uses cookies to help personalise content, tailor your experience and to keep you logged in if you register.
By continuing to use this site, you are consenting to our use of cookies.
How to Root Redmi Note 8T Without PC & Via Magisk
If you are searching for proper ways to unleash the potential power of your Redmi Note 8T device, which is only possible after rooting the device, then here you go. If you have a Redmi Note 8T Android Smartphone and you are looking forward to rooting it without PC, Mac, or laptop safely without bricking the device, then you are in the right place.
We have compelled five different methods in this simple tutorial which will guide you to Root Redmi Note 8T Without PC or With PC. As we have shown five different methods, then got the choice. If any process from the below-mentioned process failed due to any reason, then you have other methods that should work for your device.
About Redmi Note 8T
The Smartphone gets a Chipset Qualcomm SDM665 Snapdragon 665 (11 nm), CPU Octa-core (4×2.0 GHz Kryo 260 Gold & 4×1.8 GHz Kryo 260 Silver), GPU Adreno 610, Internal 32GB 3GB RAM, 64GB 4GB RAM, 128GB 4GB RAM, Camera setup includes 48 MP, f/1.8, 26mm (wide), 1/2.0″, 0.8µm, PDAF / 8 MP, f/2.2, 13mm (ultrawide), 1/4.0″, 1.12µm / 2 MP, f/2.4, (macro) / 2 MP, f/2.4, (depth), Display 6.3 inches, 97.4 cm (~80.2% screen-to-body ratio), IPS LCD capacitive capacitive touchscreen, 1080 x 2340 pixels resolution, 19.5:9 ratio (~409 ppi density).
Why Root? What is the meaning of Rooting?
If we have to describe rooting in simple terms then it is not a typical thing. Rooting doesn’t mean ‘Root’ of a tree, in fact, we are talking about Android smartphone rooting. Rooting your Android smartphone means that providing or giving superpower/ Administrator privileges to the hardware of your device. Devices are limited in terms of power, at the software (OS) level. Once you root your device, you can do whatever you intended to or want to do with your Android System Settings.
But, before we move ahead to root the Redmi Note 8T device, we must know the brief Advantages and Disadvantages of rooting your Redmi Note 8T smartphone.
Pros/ Advantages of Rooting
After rooting your device, you can do customization of your device, i.e. Installation of Custom ROMs, remove factory preinstalled bloatware, update phone to a new Android version. Apart from that, you can block Ads in any apps, Install incompatible apps by tweaking the os settings, Change the look and feel of your device by changing the skin, Boost Battery Life, and Android System Speed, add external storage, and many more.
Cons/ Disadvantages of Rooting
Rooting your device comes with cons or disadvantages as well. The biggest disadvantage is that the Phone warranty will be void once you root your device because of manufacturers ships unrooted and locked devices. Apart from that, while rooting the device, if anything goes wrong, then your device might be bricked. Manufacturers only provide updates to the unrooted devices, hence your device will no longer remain secure because it would not receive official firmware updates by the manufacturer.
How To Root Redmi Note 8T Without PC
Method 1: Root Redmi Note 8T With KingRoot
Download KingRoot APK latest version and install it. If ‘Installation blocked‘ message appears of Chrome/ Android, then take it as a reminder that you have not yet unlocked ‘Installing apps from unknown sources‘ other than Google Play. Once the installation is complete, click the ‘Open‘ button to start the KingRoot app. Tap on the ‘Try it‘ button to enter into the main interface, and click the ‘Get Now‘ button to start the rooting process. Once the rooting process is completed, you will get a message notification that Your device is Rooted Successfully. Simply return to the main KingRoot interface screen.
That’s it, you have successfully Rooted your Redmi Note 8T without PC with KingRoot APK/ App.
Method 2: Root Redmi Note 8T With KingoRoot
Download KingoRoot APK latest version and install it. If Google Chrome warning or Operating system warning appears on the screen about ‘KingoRoot.apk‘ or ‘Installation Blocked‘, then simply unblock. Just got to Settings > Security > Installation Blocked (Uncheck/ turn off the button stating Installation of apps obtained from unknown sources). and click ‘Ok‘ to proceed further to install KingoRoot.apk on your device. Then follow the instructions on the screen to install KingoRoot on your device. After installation gets completed, simply tap/ click to launch the KingoRoot app, and once you get into the KingoRoot interface, click on ‘One Click Root‘ to start rooting your device, which would take few seconds to complete and display the result on the screen. That’s all, you have rooted your Redmi Note 8T.
Method 3: Root Redmi Note 8T With Magisk
Before proceeding further to the next step, just Download ‘Magisk. zip‘ Latest version, which would accomplish the root access on your Redmi Note 8T device. Then boot your device into the ‘Recovery Mode’, just press ‘Volume Down + Power Button’ simultaneously (same time) until the boot animation appears on the screen. After that, just Tap on ‘Install‘, then Locate the ‘Magisk. zip‘ file and then select the file downloaded (magisk.zip) and then simply tap on ‘Swipe to Confirm Flash‘. It would take a few moments to complete the installation process. Once the flash process gets completed, simply tap on ‘Reboot‘. That’s it. You have successfully rooted your Redmi Note 8T device with Magisk.
Method 4: Root Redmi Note 8T With SuperSU
Download ‘SuperSU. zip’ Latest version, which is required to gain the root access on your Redmi Note 8T device. Now, just boot the device into the ‘Recovery Mode’, press ‘Volume Down + Power Button’ same time until the boot animation displays on the screen. Then, just Tap on ‘Install‘, then navigate to the ‘SuperSU. zip‘ file and then select the file supersu.zip and then simply tap on ‘Swipe to Confirm Flash‘. It would take a few moments to complete the installation process. Once the flash process gets completed, simply tap on ‘Reboot‘. That’s it. You have successfully rooted your Redmi Note 8T device with SuperSU.
How To Root Redmi Note 8T With PC
First of all, Enable Developer Options on Redmi Note 8T smartphones. Navigate to Settings>About Phone> then tap on Build Number 5 to 7 Times, the go back to the previous screen, then tap on Developer options, now just enable USB debugging. After that, Connect your Redmi Note 8T Smartphone with your computer/ PC via USB cable. Now, download KingoRoot software in your PC & then install the same on your computer. After installation of the KingoRoot software, click on the KingoRoot icon on your desktop. Once the software opens, Connect the phone quickly to the PC, a prompt would appear on the screen, just Tap On Okay. Once the device is Recognized by the System, just tap on ‘Root‘. After that, it would hardly take a few minutes to complete the rooting process.
That’s all, you have successfully rooted Redmi Note 8T.
If you have gained root access through any of the aforementioned five methods, then it’s time to enjoy the full power of your device. If in case you want to confirm that whether your device is rooted or not, then simply go to Google Play App Store, and then search and download the Root Checker app to check if the root is successful.
Hopefully, the tutorial is useful, and you might expect to see more articles. If there are any suggestions, criticism, kindly comment on the below article. Do not forget to like our Facebook Fanpage and Follow our Twitter Handle to get in touch with our updates.
Xiaomi Redmi note 8
Disclaimer:
Team Win strives to provide a quality product. However, it is your decision to install our software on your device. Team Win takes no responsibility for any damage that may occur from installing or using TWRP.
Status:
Support Status: Current
Maintainer: erwinabs
Code Name: ginkgo/willow
Device Tree / files
Support thread on xda-developers
Notes About Xiaomi Mi Devices:
Some Xiaomi Mi devices have bootloaders that require additional steps to unlock before you are able to flash custom images. This typically involves using MI Unlock Tool to apply & wait for certain time period to have your device unlocked.
You will need to follow the steps on Xiaomi’s MIUI website in order to unlock your device.
Understand that unlocking your device will wipe all of your personal data, settings, and apps from its memory.
See: Apply for unlocking Mi devices
App Install Method (Requires Root):
Download the Official TWRP App (root required):
Install the app and open it. Agree to the Terms. Select TWRP Flash. Select your device from the device list (ginkgo/willow) and choose a version. The file will download to your Downloads folder. Browse to and select the file. Tap on Flash to Recovery. Find out more about the app here.
Download Links:
Current and past versions of TWRP can be found at one of the mirrors below:
TWRP Install (Requires TWRP 2.8.4 or higher already installed):
Download the latest TWRP image file (.img) from the download link and boot TWRP. Go to install and find and select the Images… button. Browse to the image that you downloaded and select it. Choose recovery and swipe to flash.
Fastboot Install Method (No Root Required):
You will need the platform-tools from the Android SDK on your computer. Download the platform-tools as per your operating system.
Windows users will need proper drivers installed on their computer. You can try the simple FWUL adb/fastboot ISO or the Naked ADB drivers or the Universal ADB drivers if you don’t already have a working driver installed
On your device, go into Settings -> About and find the Build Number and tap on it 7 times to enable developer settings. Press back and go into Developer Options and enable USB debugging. From your computer, open a command prompt and type:
adb reboot bootloader
You should now be in fastboot mode.
Download the correct image file and copy the file into the same folder as your platform-tools. Rename the image to twrp.img and type:
fastboot flash recovery twrp.img
fastboot reboot
Note many devices will replace your custom recovery automatically during first boot. To prevent this, use Google to find the proper key combo to enter recovery. After typing fastboot reboot, hold the key combo and boot to TWRP. Once TWRP is booted, TWRP will patch the stock ROM to prevent the stock ROM from replacing TWRP. If you don’t follow this step, you will have to repeat the install.
Changelog:
Install TWRP and Root Redmi Note 8/8T via Magisk
In this guide, we will show you the steps to install TWRP and root Redmi Note 8 and Redmi Note 8T via Magisk. The Note series from the Chinese OEM has always been among the most talked-about devices in the smartphone industry. before its releases, they tend to generate quite a tremendous amount of hype, and more often than not, they stood up to the expectations. When you are guaranteed a power-packed device at an affordable price, there’s not much left to ask.
Along the same lines, these devices have been regular visitors to custom development. There are a plethora of mods and tweaks that you could try out onto your device. Once you complete the sole prerequisite aka unlock the bootloader, then you would have opened the floodgates to customizations. These include the likes of replacing the device’s stock recovery with a custom one or gaining access to the system partition by rooting the device via Magisk.
Once rooted, you will be able to flash Magisk Modules, Xposed Frameworks or Substratum Themes. Talking about the benefits of TWRP, well you could create and restore Nandroid Backups, flash ZIP and IMG files, use the in-built terminal to execute commands, fix recovery bootloop, wipe device partitions, and the list goes on. So if you are looking to welcome these features onto your device, then you have come to the right place. Given here are the detailed instructions to install TWRP and root Redmi Note 8 and Redmi Note 8T via Magisk.
How to Install TWRP and Root Redmi Note 8/8T via Magisk
By now, you are pretty much aware of the perks of carrying out these tasks, But let’s also get you acquainted with the risks involved in doing these tweaks. To begin with, upon unlocking the bootloader, your device’s warranty will become null and void. Likewise, the process will wipe off all the data from your device. Upon rooting, apps like Google Pay might no longer function [though you could hide root and Pass Magisk SafetyNet on Rooted Android].
Furthermore, you might not be able to stream Netflix in HD due to the degradation of WideVine Certification from L1 to L3. If all that’s well and good, then let’s get on with the guide to install TWRP and root Redmi Note 8 and Redmi Note 8T via Magisk. Droidwin and its members wouldn’t be held responsible in case of a thermonuclear war, your alarm doesn’t wake you up, or if anything happens to your device and data by performing the below steps.
STEP 1: Download the Required Files
First and foremost, there are a few files that you need to get hold of. Here’s the download link for all these files as well as the need to flash/install them:
That’s it. These were all the requirements. Let’s now start off with the guide to install TWRP and root Redmi Note 8 and Redmi Note 8T via Magisk.
STEP 2: Enable USB Debugging and OEM Unlock
You will have to enable USB Debugging so that your device gets recognized by your PC in ADB Mode. But why ADB? Well, it’s because we will be using this ADB mode to boot your device to Fastboot. On the other hand, OEM Unlock is needed to be enabled so that you are able to unlock the device’s bootloader. So head over to Settings > About Phone > Tap on Build Number 7 times > Go back to Settings > System > Advanced > Developer Options > Enable USB Debugging and OEM Unlock.
STEP 3: Unlock Bootloader on Redmi Note 8/8T
Before you could flash any of the above mods, you will have to unlock the device’s bootloader. This requires enabling OEM Unlock, booting the device to Fastboot Mode, connecting to PC, and clicking Unlock in the Mi Unlock Tool. For detailed instructions on this, please refer to our comprehensive guide on How to Unlock the Bootloader on any Xiaomi Device. Do remember to take a backup beforehand.
STEP 4: Boot Redmi Note 8/8T to Fastboot Mode
Next up, you will have to boot your device to Fastboot/Bootloader Mode. This is because we will be able to install TWRP and root Redmi Note 8/8T only after it has been booted to Fastboot. So follow along for the steps:
Connect your device to the PC via USB cable. Make sure USB Debugging is enabled. Then head over to the platform-tools folder, type in CMD in the address bar, and hit Enter. This will launch the Command Prompt. Type in the following command in the CMD window: adb reboot bootloader You should now see the Mi bunny logo with the Fastboot text underneath. This indicates that the device has been successfully booted to the Fastboot Mode.
STEP 5: Install TWRP Recovery on Redmi Note 8 and Redmi Note 8T
Let’s now start off with the process to install the TWRP Recovery onto Redmi Note 8/8T. Make sure that the device is booted to Fastboot and connected to the PC via USB cable. Furthermore, the CMD window should be opened inside the platform-tools folder.
Transfer the downloaded recovery file to the platform-tools folder. Likewise, change its name from twrp-3.5.0_9-0-ginkgo to twrp, hence the complete name becomes twrp.img. Now type in the below command to flash the TWRP Recovery to the recovery partition: fastboot flash recovery twrp.img Once that is done, input the following command to boot your device to TWRP: fastboot boot twrp.img
Your device shall now boot to the TWRP Recovery, it’s time to remove encryption before we could root Redmi Note 8 and Redmi Note 8T via Magisk.
STEP 6: Decrypt Data Partition via TWRP
You will now have to decrypt the data partition so that TWRP is able to read the contents on your device. If you don’t do so, then you might face some issues such as file name being shows as a random string of characters or Internal Memory showing 0MB. So let’s fix these issues beforehand itself! [the below process will wipe the data, make sure to have a backup]:
Now that your device is booted to TWRP, go to Wipe. Then tap on Format Data and type in Yes in the space provided. Tap on the blue checkmark situated at the bottom right. The data wipe shall now begin and shall only take a few seconds. Once done, go to Reboot and tap on Recovery. Your device will now reboot to TWRP.
So with this, we have successfully installed TWRP Recovery. Let’s now turn our attention towards the steps to root Redmi Note 8 and Redmi Note 8T via Magisk.
STEP 7: Root Redmi Note 8 and Redmi Note 8T via Magisk
To begin with, transfer the Magisk ZIP file and the Disable_DM-Verity ZIP file to your device. Or if you have already transferred the file to the SD Card or are using OTG, then it’s well and good.
Now go to the Install section of TWRP and navigate to the Magisk ZIP file. Select this file and perform a right swipe to flash it.
Once done, again go to Install and this time select the Disable_DM-Verity ZIP file. Likewise, perform a right swipe to flash this file as well.
Once both these files have been flashed, go to Reboot and tap Recovery. Once it reboots to TWRP Recovery, you may now boot it to the OS. For that, go to Reboot and select System.
That’s it. Your deice shall now boot to the rooted OS, with TWRP installed.
So with this, we conclude the guide on how to install TWRP Recovery and root Redmi Note 8 and Redmi Note 8T via Magisk. If you have any queries concerning the aforementioned steps, do let us know in the comments. We will get back to you with a solution at the earliest.
Redmi Note 8/8T Unbrick Bootloop Fix Guides
If at any point in time, you get stuck in a bootloop or soft brick, then you could easily fix this issue, This is possible by flashing the stock firmware via Fastboot Commands. You may refer to our comprehensive guide on this topic: How to Unbrick Redmi Note 8 via Fastboot Commands.
On the other hand, if your device gets hard-bricked, then things might get a little bit complicated. This is because Xiaomi now requires an authorized account to flash firmware in EDL Mode. With that said, there do exist a few workarounds that you may refer to :
키워드에 대한 정보 root redmi note 8 t
다음은 Bing에서 root redmi note 8 t 주제에 대한 검색 결과입니다. 필요한 경우 더 읽을 수 있습니다.
이 기사는 인터넷의 다양한 출처에서 편집되었습니다. 이 기사가 유용했기를 바랍니다. 이 기사가 유용하다고 생각되면 공유하십시오. 매우 감사합니다!
사람들이 주제에 대해 자주 검색하는 키워드 How to root Xiaomi Redmi Note 8/8T
- 동영상
- 공유
- 카메라폰
- 동영상폰
- 무료
- 올리기
How #to #root #Xiaomi #Redmi #Note #8/8T
YouTube에서 root redmi note 8 t 주제의 다른 동영상 보기
주제에 대한 기사를 시청해 주셔서 감사합니다 How to root Xiaomi Redmi Note 8/8T | root redmi note 8 t, 이 기사가 유용하다고 생각되면 공유하십시오, 매우 감사합니다.